Showing posts with label Backyard living. Show all posts

Monday, April 29, 2013

Spring Green Onion Pasta with Asparagus


We've been making our own pasta lately and it really transforms Italian eating.  I have been singing its praises ever since Christmas, when we got our pasta press.  If you have one sitting in a dusty cupboard, dig it out!  If you don't have one, this can be made by hand but it is a bit more labor intensive.

We made this delicious pasta last week and I wanted to write down a few notes about it before I forgot.  This is less of a "recipe" per se and more of some general guidelines.

Spring Pasta With Asparagus

The Pasta
Green Onion Pasta (devised and crafted by Barry!)
(We use this basic recipe.  The key to eggless pasta is to use semolina flour and knead it a lot!  A KitchenAid works wonders here!  You can add a lot of seasonings to the pasta.  This time we added about a cup of chopped green onions.  Often we'll add herbs, garlic, sundried tomatoes, etc.  The possibilities are endless!)
The Toppings
Steamed asparagus spears
Zest of one lemon
Slivered basil leaves
Carmelized onions
The Dressing
Juice of one lemon
2 TBSP olive oil (I added in a dash of truffle-flavored olive oil as well)
Salt
Garlic powder
Italian seasoning

Monday, February 11, 2013

Winter Garden

Citrus and leeks does a happy tummy make.  This bounty went into a potato leek soup and fresh orange grapefruit juice.  Both were delicious, made even more so from knowing where they were picked.


Wednesday, August 1, 2012

Fresh Eats


Our first heirloom tomato this season - A Striped German!


Veggie wraps with the siblings - colorful and full of flavor!  Definitely worthy of a more permanent place in our meal rotation.  Components: tomatoes, cucumbers, sprouts, lettuce, onions, green peppers, carrots, green hummus, vegan cheese sauce, and spinach wraps!


Gifted quail eggs (Thanks Maribel!).  They became a delicious mini omelet that we used as the first course of our date night meal :)

Monday, July 9, 2012

Garden Meals

Just a few pictures from what we've been cooking lately.  As you can see, there have been lots of tomatoes around here these days!  Also pictured are plums (which were quickly made into plum jam), leeks, peaches, and fresh herbs being made into a yummy lasagna.  The garlic sauce on top of both the lasagna and the pizza is the same incredible stuff that I posted about last week - what a revolutionary sauce it has been!


Lasagna in the making


A new backyard friend!


A cute slipper tomato!


Tomato hats!


Four pounds of backyard produce about to be roasted and made into tomato sauce!


Thursday, June 2, 2011

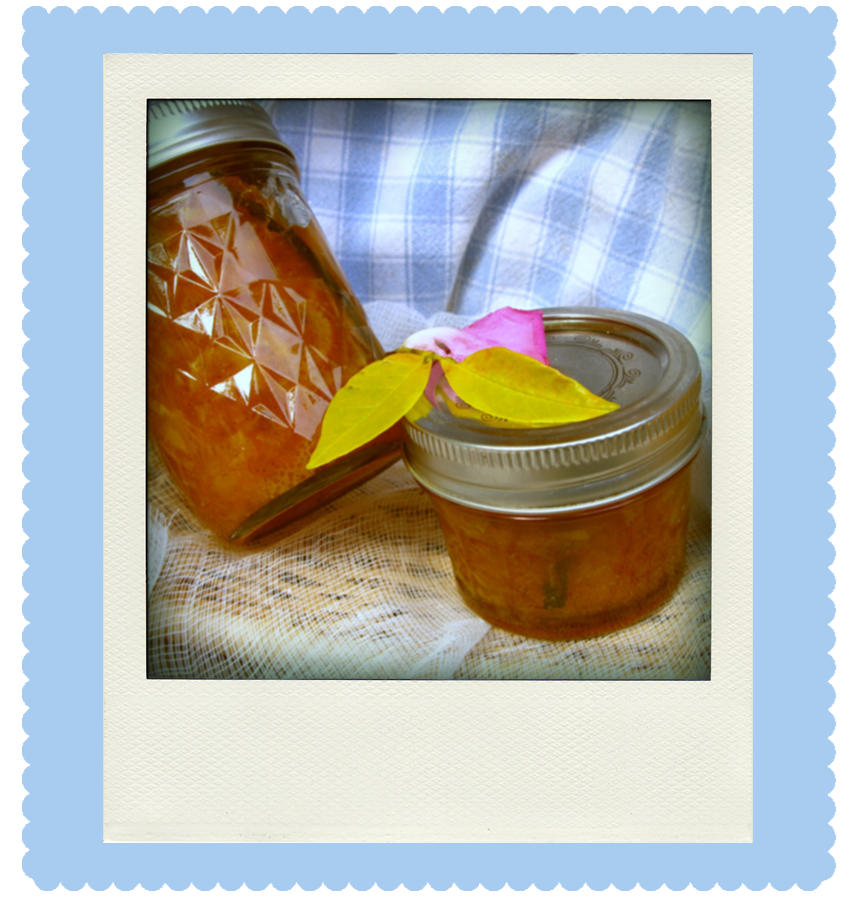
Backyard Marmalade (Take Two!)


This time our marmalade attempts were a success! Unlike
last time, this marmalade, made up of Meyer lemons and oranges, set up beautifully. It only had the tiniest hint of bitterness, which, I've learned, is appropriate for a good marmalade. Barry says that it is "the best marmalade I've ever had". It really is delicious. The vanilla bean adds some depth that I wasn't expecting. Since we made this batch, we've made several more batches - even one with strawberries! They've all been yummy. Here's the basic recipe and instructions.


Backyard Marmalade

Overview
This method is a two day process but don't let that scare you away. I found it much easier to divide the work over two days instead of trying to do everything in one day. You can enjoy it more, plus the flavors really develop when you let it sit overnight. I also used a different method for the oranges and the Meyer lemons. Because the Meyer lemons have such thin skin, you don't have to take off the white pith, which makes things much easier!

Ingredients
10 Meyer Lemons
10 sweet oranges (We're not sure what type our backyard oranges are.)
6 cups of sugar
1 vanilla bean

Special Equipment
Small Canning jars (I used 8 oz and 4 oz jars)
Canning equipment
Cheesecloth
Candy thermometer (optional)

Day One

1. Wash and dry all fruit. I used 10 Meyer lemons and 10 oranges. (We're not sure of the exact variety of our backyard oranges. They are sweet and very juicy!)

2. Using a vegetable peeler, remove the zest from the oranges. Avoid as much of the white pith as possible. Cut the zest into thin ribbons using a large chef's knife and place in a nonreactive pot. (You want them thinner than what is pictured to the side. I hadn't finished cutting them.)

3.
Oranges
Take the pith-covered oranges and cut the ends off. Set the orange up on end and, working around the whole orange, cut off the bitter pith.

4. Using a paring knife and holding the orange over your pot with the zest, separate the orange segments from the membrane and drop into the bowl. Here's a great
how-to video that I found. Also remove any seeds you find and place in another clean bowl. Once you've finished with an orange, squeeze out all the juice from the membrane into your pot and place the remaining membrane with the discarded seeds to save for later.

5.
Meyer Lemons
Cut each Meyer lemon in half and, working over your pot, use a paring knife to make a notch and cut around the membranous middle. Here is a great picture of the process. Squeeze juice from this middle section into the pot and then place the membrane aside in your membrane/seed bowl. Use your fingers to remove any seeds from the rest of the lemon, dropping them into your membrane/seed bowl.

6. Using a sharp knife, cut the lemons into thin slices.
You don't have to separate the peel from the flesh. Add slices to the pot.

7. Drain any extra juice from your membrane/seed bowl into the pot.

8. Cover the fruit with water and simmer for 5 minutes. Let mixture cool and then place in the fridge overnight.

9. Place your reserved membranes and seeds in the center of a large cheesecloth square. Tie corners tightly together and place on a plate in the refrigerator.


Day Two

1. Sterilize the jars you plan to use and simmer the lids in a small pot. My marmalade made enough to fill six 8 oz and three 4 oz jars.

2. Slice your vanilla bean lengthwise and use a small knife or your thumb to remove the seeds. Add seeds to the orange/lemon mixture. Also add empty vanilla bean pods to the pot.

3. Simmer mixture for 5 minutes and then add 6 cups of sugar.

4. Boil mixture until it reaches the jelling point (check the wrinkle test) and/or 220 F (Mine only got to 216 F). The wrinkle test is done by placing a spoonful of marmalade on a chilled surface. I used a clean jar lid that had been in the freezer for 30 minutes. It should still be thin at this point. Return after a few minutes to see if it passes the wrinkle test, which means it will have thickened up and will wrinkle with you push it with your finger. You may have to add some added pectin at this point. Mine worked out fine but on a later batche (probably when I used less sugar), I had to add some pectin. Note: It should not be the consistency of marmalade at this point. It will seem much too thin and runny. It will thicken to the final consistency when cooled. However, it
should pass the above tests. If it does not, it won't be thick enough later.

5. Remove the vanilla bean from the mixture and rinse. Cut into smaller lengths to add to your jars before processing.

6. Ladle mixture into jars and add your vanilla bean pieces. Clean jar rims before placing sterilized lids and screwing them down tight. Process in a water bath canner for 10 minutes.

7. Enjoy!

Three helpful sources that I referenced:

    Friday, April 8, 2011

    Backyard Living: Marmalade


    We have several fruit trees (3 orange trees, 2 lemon trees, a persimmon tree, and 2 avocado trees) in our back yard that we have been enjoying since our move here last fall. One of the orange trees had a fall crop which we gobbled up fresh. But now all three orange trees are having their spring crop - and there are more oranges than we know what to do with!


    It would be a shame to get through citrus season without at least attempting some marmalade so I scoured the internet looking for techniques and recipes. I found one that seemed foolproof, quick, and easy. I used a combination of meyer lemons gathered from a nearby deserted tree, pink and yellow grapefruit donated to us from a church member, our backyard oranges, and a handful of frozen cranberries.

    Unfortunately, my first batch wasn't stellar. It didn't set up very well and had a bitter aftertaste that just wasn't very pleasant.  I have since decided that I need to go with a slower, more time intensive process but that should hopefully yield better results. More on that soon!  (As in, when I have a spare moment to actually make it!)  For now, you can enjoy the pictures from my first batch!  At least it looked pretty!

    Saturday, April 2, 2011

    At the Heart of an Inferior Olive

    I recently bit down on a half-cured, unripe olive. It was a disappointing gastronomic experience, to say the least. Our personally picked olives had cured for two months in a concentrated brine, and most of them were pretty good. This particular olive, however, was decidedly inferior--so inferior, in fact, that it got me thinking.

    As a medical student my mind has sunk deep into medical tracts. So when I thought of that bitter olive, the inferior olivary nucleus came to mind. This nucleus relays information to the cerebellum, which basically means that it is involved in muscle coordination.

    Coordination is important not just as I walk to class or scribble notes about neuroscience but also as I seek a clutter-free life. Take those olives, for instance. Christy and I believe that picking our own olives is a good way to both practice and enjoy the ethic of simplicity. We simplify our budget by picking and curing our own olives, while at the same time we experience the simple joy of personally selected olives seasoned with garlic and rosemary. In this way, a small budget coordinates, rather than conflicts, with the joy of good food.

    Such coordination doesn't always happen, however. Sometimes, we soldier through a few days of beans and oatmeal in order to stay within our monthly food budget. And sometimes, a bitter olive greets my taste buds instead of a gourmet delight.

    So from the heart of an inferior olive(ary nucleus), we have learned two things about the ethic of simplicity. First, practicing idealism in the real world does not come without sacrifice. Like it or not, freedom from clutter inevitably means a few "bitter olives". The second point, however, is that living simply is not a zero sum game with all the good things of life. Coordination is possible. We have discovered, in fact, that coordination happens far more often than conflict. The tasty olives really do outweigh the bitter. In fact if you haven't already, we highly recommend that you taste for yourself one of these days.

    Sunday, February 27, 2011

    Backyard Living: Curing Olives

    Living in Southern California has opened up a new world to us agriculturally.  Barry and I both grew up in families who gardened, but neither of us have ever lived in a place with such abundant food growing everywhere!  One crop that grows here and is ignored a lot of the time is the olive tree.  My friend Nellie and I went olive picking at a church member's home last fall and we are now reaping the results.

    The following method is one that I decided on after doing lots of internet research.  There are many other ways to do it, but we decided on the following because it was less complicated.


    After picking the olives, you wash and dry them.


    Then you make 1 or 2 cuts in the flesh of each olive so that the bitter acid will leech out.  This takes a bit of time but with more than one person helping, it can go pretty fast.


    Next you place them in a salt brine (about 1/4 cup salt per quart) and let them soak, and soak, and soak.  A large glass container or several quart jars works best for this.  (Note: do NOT soak them in stainless steel.  We tried this and discovered that, if pressed against the metal for an extended period of time, the acid in the olives would actually begin to eat away at the metal.)  The salt water should be changed every 4-7 days depending on the amount of salt you used.  


    After about 2 months of soaking (although it can be longer or shorter depending on the size), the olives should be quite edible!  Taste one and see what you think.  If they are still somewhat bitter, soak them for 1-2 more weeks. If they are too salty, place them in clean water (no salt) to draw out the sodium.  

    You can then season them with things such as garlic cloves, lemon slices, and bay leaves.  Place them in a quart jar with a lightly salted brine and the seasonings.  Pour a thin layer of olive oil on top to seal.  They can then be kept for up to a year (if they last that long!)


    To tell the truth, this post is not just about olives.  It's about being creative with what you have on hand, instead of spending money in order to satisfy every need or desire that crops up.  It doesn't have to be olives or persimmons.  For you, it may mean saving and reusing the fabric from old clothing, or making a commitment to avoid food waste.  Whatever it may be for you, be assured that it makes a difference!

    Tuesday, December 21, 2010

    Backyard Living: Persimmons!

    For us, living simply means making do and finding ways to be creative with what you already have.  We've found that in the end, we are doing so much more than just "making do", we are living a life full of abundance and satisfaction.  Here is one example involving persimmons!

    - - - - - - -

    On my personal blog, I've blogged about my persimmon pecan pie and my persimmon cookies - but I hinted that we'd been doing a lot more with our persimmons than had been revealed. I've been taking pictures of our persimmon experiments for about 2 months now - but I was waiting for our Barry & Christy blog to get up and running before sharing. During that time we've also been perfecting our experiments :)

    We've really enjoyed learning about and using the fuyu persimmons from our tree. And believe me, the tree is quite large and was quite laden with a bountiful harvest. We were determined to use them as much as we could. We really wanted to practice our simple living principle of using what is at hand first before buying something else - in this case, food! So we set out with great aims to experiment and creatively incorporate persimmons into our daily lives.

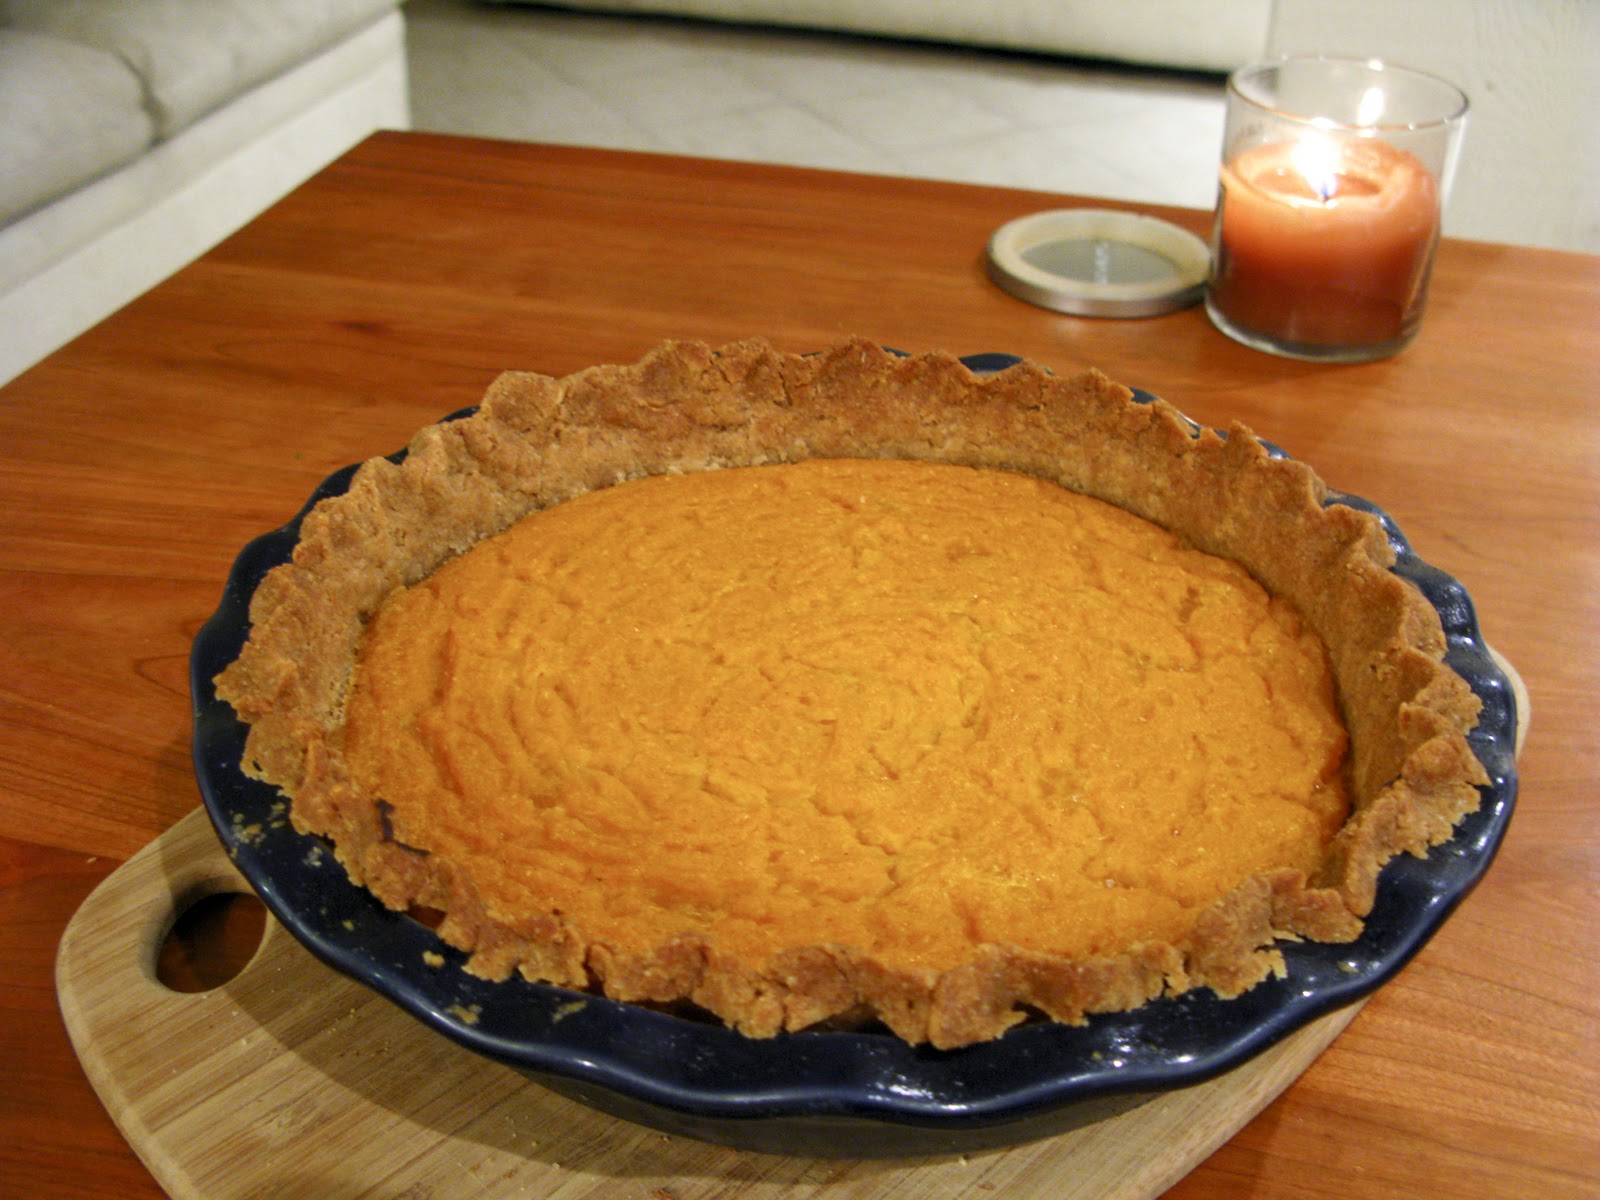
    We read on the internet that fuyu persimmons should be eaten like apples. So we decided to cook them down like applesauce! Imagine our surprise when they began to smell and taste like sweet squash! So that's how the pumpkin/persimmon pie idea was born.


    We began using the persimmons when they looked like this. However, we found out later that these are still not ripe. They tasted decent and cooked down great, but their prime comes when they turn a deep, almost reddish orange.

    Like this:


    Making sauce in our food strainer.

    My first pie experiment. This one had tangerine slices in it! It was very yummy!


    Cranberry - persimmon mixture

    A mini version of our persimmon cranberry pecan pie

    Making a persimmon cranberry crumble for potluck.

    Our initial aim was to can all this sauce that we were making but our internet searches didn't turn up much information. I did find a few places that said that persimmons couldn't be canned because their pH was too high. Canned goods should have a pH lower than 4.6 to ensure that botulism won't grow. But we've also read in canning books that you can lower the pH of foods to a safe canning level by adding lemon juice or a powdered ascorbic acid that doesn't have a taste.

    We wanted to can the sauce but because of our uncertainty, the first few batches of sauce that we made were either made into pies, cookies, or crumbles, or frozen in ziplock bags. But we hadn't given up on the canning idea quite yet. I was able to get some saliva pH testers at the health food store that went down to 4.5. We knew that if we could get it down to 4.5 with lemon juice and powdered acid, than things should be fine. The initial reading was about a 5.75. By adding a good deal of lemon juice (which we think enhances the flavor), we were able to lower it to about a 5. Then we added some Fruit Fresh, which is usualy used for keeping sliced fruit from turning brown. But it's first and second ingredients were citric acid and ascorbic acid so we figured it would work. It did! The pH came all the way down to a 4.5! Because of all the added lemon juice and the citric acid from the Fruit Fresh, it did have a bit more tang to it then I would have wished. I think next time I would go out and buy some ascorbic acid, which isn't supposed to have a taste.

    So then we canned that batch - which made 3 quart jars full. I am still not certain of the validity of our approach because I've also read cautionary information about canning sauces that are too dense - such as pumpkin butter. This sauce is also quite dense and may not have heated up to the right temperature. So even though the pH has been lowered, I'm not sure I recommend others trying this method yet. I would have felt better about things had we pressure canned them but we don't have a pressure canner at this point.

    Here are the cookies! And the cans of persimmon sauce behind them.


    While you may not have your own persimmon tree in the backyard, the principle of this blog can still be applied in your daily life.  Whether it involves food, appliances, clothing, or any other item, using what you have on hand before buying something new is a sure-fire way to cut down on expenses, stuff, and stress.